We walk you through how to take screenshots on a Chromebook
Chromebooks are one of the best-ranking laptops out there and knowing how to take a screenshot on it could be beneficial for you to hold any important results quickly that you want to work on later.
Well, taking a screenshot on a Chromebook is pretty easy. To use its full potential you should know the basic shortcuts. There are various options you can try for screengrabbing.
This tutorial will show you how to take a partial and full screenshot on a Chromebook laptop. For this, we will be using the Google Pixelbook Go. The process is the same for all Chromebooks.
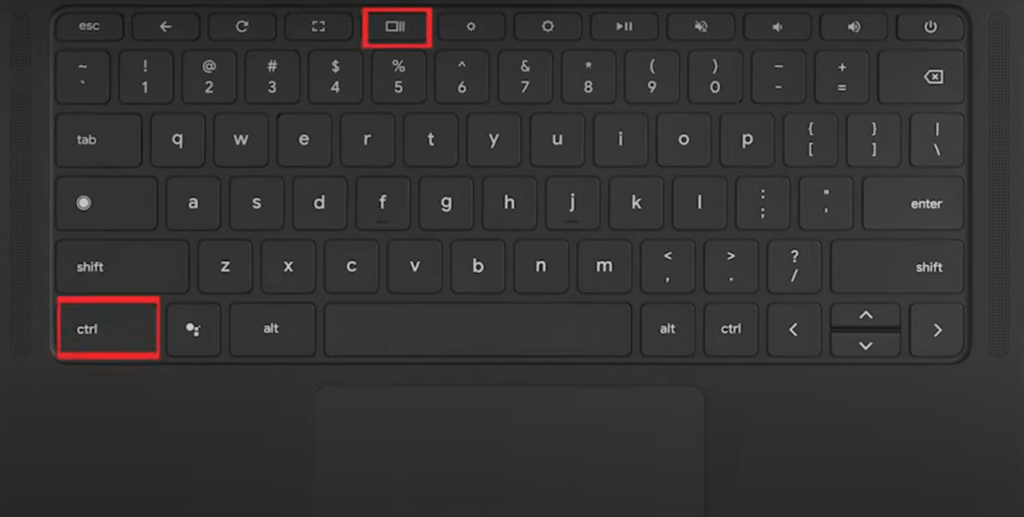
To take a screenshot of the Entire screen, press the Control key and the Show-all-open-windows button Simultaneously.

When you take any kind of screenshot, you’ll see an image of it appear at the bottom right corner of your screen.
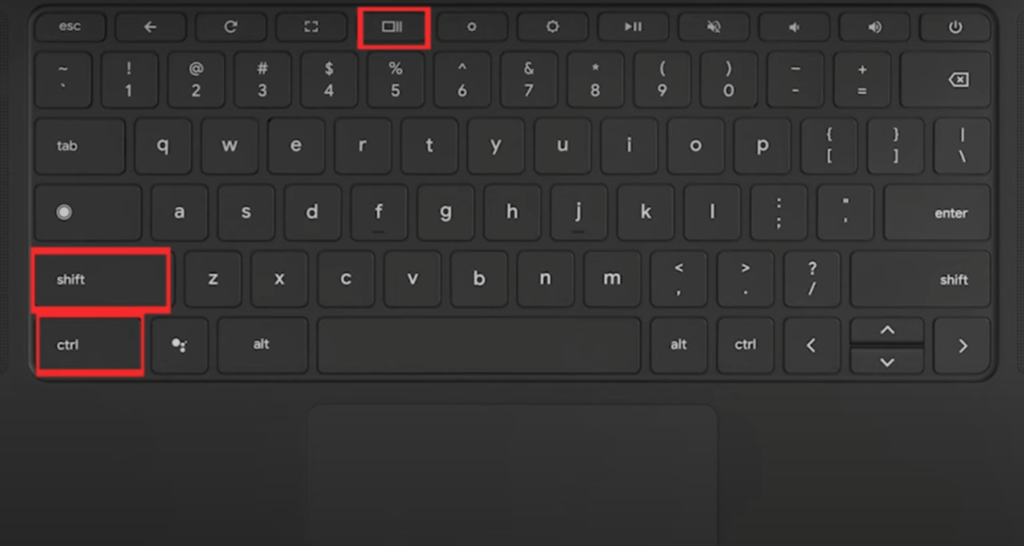
To take a Partial Screenshot, press the Shift and Control keys as well as the Show-All-Open-Windows button at the same time

Afterward, use your cursor to click and drag a box around the area you want to screenshot.
After taking a screenshot, you will have the option to open it by clicking the pop-up and then selecting the screenshot from your files folder. If you need to find an older screenshot, click the circular button at the bottom left corner of your screen, and then click “Files,” select “Images” in the upper left corner, and choose your screenshot.

